Many of us have a favorite pair of jeans, a denim jacket that holds memories, or the desire to fix up our old clothes. Some might also want to fix up those classic frayed jeans if they’re tired of that fashion. If that’s the case, there are many reasons why we need to know how to sew on a patch on denim.
When you patch up some denim, you save the rest of the clothing from going to waste. In fact, when you can patch it, you can style it in different ways.
Fortunately, you can learn how to sew on a patch very easily. There are actually quite a few ways to go about this task. The traditional way is to use a thread and needle, of course, but there are also some fixes that may save you the stitching.
A non-stitching method usually requires some fabric glue. If you don’t have the strongest kind of glue, you’ll notice that this may not be a permanent way to patch your denim.
However, it’s still a handy method for those who have issues with stitching, such as those suffering from arthritis or rheumatism.
Patches are not just a way to fix up your denim-based items, though. Once you’ve mastered the art of how to sew on a patch, you can use the same technique to fix up your other well-loved clothes.
HOW TO KNOW THE RIGHT SIZE PATCH
image via: pixabay.com
The first step is to know the right size and kind of patches for your denim. These are nothing more than squares of fabric in varying sizes. You can probably buy them in certain stores, where embroidered options are available.
There are also sequined, beaded, and felt patches in stores. Felt is a material that’s especially good for patching, as it doesn’t fray at the edges.
If you want a special kind of patch, you can always cut and embroider it yourself. That will help you get the exact kind of look you want without having to waste time looking for the perfect match.
Before making or buying your patches, you should take some measurements from the hole in order to work out the quantity of fabric you require. When measuring, you should also make sure the denim clothing is stretched out flat on a horizontal surface.
Another thing to check is that there should be no ragged pieces or excess thread to get in the way of your measuring. You can trim those with scissors before using the measuring tape, as these can make the hole seem smaller.
Your patch needs to be large enough to cover the hole and then some. Therefore, you should add a half-inch to your measurements before cutting out the fabric.
Image via Pexels
MATERIALS YOU NEED TO SEW THE PATCH
Before you can learn how to sew on a patch for denim, you need to have the right supplies for the job. The material for the patches is a major necessity.
You might want to match the fabric with the original clothing as closely as possible. However, that isn’t always necessary.
If you find a fun print at the fabric store or you have a couple of scraps lying around, you can get creative.
At the end of it all, however, the patch will be evident on the clothing. So, it’s time to be proud of your patching skills and flaunt your patch as a fashion statement!
HOW TO DO THE SEWING RIGHT BY USING THE STANDARD METHOD
image via: pexels.com
If you want to know how to sew on a patch instead of simply gluing it on, you have to concentrate on the exact method of sewing. As long as you have a functional sewing machine or a decent sewing kit, there’s no reason to get fabric adhesive of any kind.
After you’ve used your scissors to trim the loose threads and frayed edges, you’ll need fabric pins, thread, a pencil or pen, paper, fabric, and a sewing needle.
If you want no-stitch patching, you’ll need to collect scissors, fabric adhesive or some fusible web, the fabric itself, paper, and a pen. Remember, you still need to trim the holes and make them neat whether you’re stitching or not.
HOW TO SEW ON A PATCH: UNIVERSAL GUIDELINES
There are some universal steps to take if you want to know how to sew on a patch. No matter whether you’re fixing jeans or a denim jacket, you have to turn it inside out before sewing on the patch. You must do this after you’ve cleared away the loose and frayed ends.
The next step is to put some paper under the rip or hole, and then trace along the hole with a pen or pencil. Now, take the paper away and draw around the traced hole, leaving about half an inch of space between the original line and the new one.
The result will be the size and shape you need your patch to have. Cut out the tracing along the new, larger lines; this is your stencil. Lay this stencil over the patching fabric, and cut out your patch.
Now that you have your patch ready, lay it out on top of the hole in the clothing, which should be inside out. Secure it with some pins.
If possible, you can measure around this area and take double the amount of thread to the result. Thread your needle and pull the thread until its ends align with each other. Make a knot, and you’re ready to sew!
Then, start on any kind of stitch to fix your patch in place. You should make the stitches as tight and small as possible.
A slip stitch means that your needle will go through your fabric in a diagonal direction. If you do decide to go with this option, you should keep the stitches very small.
If you don’t, you could risk the fabric moving, or the thread might bunch out.
Keep the pins in until you’ve finished your sewing. When you’re done, fix the ends before cutting any excess thread.
HOW TO SEW DIFFERENT TYPES OF PATCHES
image via: flickr.com
It’s amazing how each patch is different. What’s more exciting is that you can change the look of your denim clothing or accessories by using unique patches.
FIXING WITHOUT ANY STITCHES
In case you don’t have the supplies or simply don’t want to sew for some reason, there is a way to patch up your clothing without stitching it.
Again, you want to make sure that the clothing item is inside out and laying flat on a horizontal surface. Now, put a piece of paper or cardboard under the hole and make your stencil as you do with the stitching version.
Next, you can apply fabric glue or adhesive to the hole’s border. There should be enough all-around to come into contact with the overlapping patch.
Now, smooth out the patching fabric and cut out the patch according to the stencil. You’ll have to wait a bit before sticking it on, according to the instructions on the adhesive.
In case you’re using fusion webbing, you should follow the instruction on the specific kind you have. Again, you’ll have to apply the webbing all around the border and then stick on the patch.
Then, you can iron on the patch in order to apply the required heat for activating the webbing.
Image via Pexels
APPLIQUÉD PATCH
Now that you know how to sew on a patch, let’s take a look at how to sew an appliquéd patch. An appliquéd patch is sewn by hand or a machine right onto the face of your garment.
After measuring and pinning the pans, you use a blanket switch for hand-appliqué. That has turned edges. For a sewing machine, you’ll use tight stitches in a zigzag fashion.
HANDMADE OVERHAND PATCH
It’s another kind of patch you sew from the face or the right side of your clothing article. If the garment has a thick fabric, you’ll use a thinner one for the overhand patch. If you don’t, the patch will project outwards.
OVERHAND PATCH
For an overhand patch, you should make the hole or rip into a square shape first. Next, cut out a square patch that’s a little bigger than your square hole. Press the patch’s edges about a quarter of the way inside the hole. Then, baste it with stitches along the edges.
Image via Pixabay
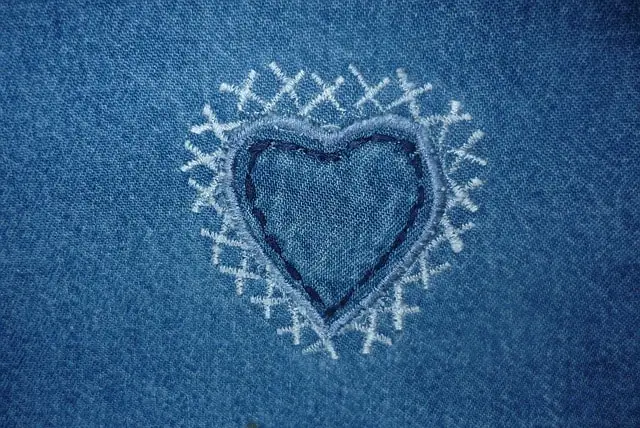
EMBROIDERED PATCH
For additional flair, you can also get patches that have embroidery on them. These are usually of thick fabric and come in all shapes and sizes.
If you buy these, you can attach them right onto the denim without turning down the edges. That’s because the edges are usually prefinished and resistant to fraying.
You can then apply the patch on the fabric using tiny hand stitches or a sewing machine. Check out whipstitching for handwork, and baste the fabric together beforehand.
Once you’ve applied the patch to the hole, turn the garment inside out. Now finish off the edges with an overcast stitch, and you’re done! For durability, you can sew the patch down one more time.
REVERSE APPLIQUÉ PATCH
A reverse appliqué patch is applied from the back of your garment. You cut the hole in the shape of the appliqué design, and stitch all around the hole’s edge.
For this method, satin or small zigzag stitches are best. However, you can also use a straight stitch. If you want the stitching line to be visible, you might want to put two spools in your sewing machine.
Image via Pexels
DARNING PATCH
You can sew a darning patch by putting a patch of fabric underneath the hole. Then, use very close straight stitches to sew the patch all around. You may use the reverse switch as well in order to make sure everything is in place.
You should also make sure to use a colored thread of exact machine on both the bottom and the top. If you don’t want the stitched cloth to be visible, it’s wise not to go for a light color for the thread. If you can’t find the exact same color, you can choose something darker instead.
FLANNEL PATCH
A flannel patch is made of felt and can be either a match or contrast in color. You can start off by cutting a piece in a square shape, making sure it’s larger than the hole.
Now, put your patch above the hole, and baste the two fabrics together. Use buttonhole stitches to apply the patch firmly to the original fabric.
Next, you turn the clothing article inside out and cut away the worn or frayed edges. Use catch stitches to affix the patch properly, and pluck out the basting stitches.
You may also choose to keep the flannel or felt underneath the hole. That will be an advantage, as it would prevent the patch’s edges from fraying. However, you might not find this technique as comfortable as putting the patch outside the hole.
Image via Pexels
WHICH PATCH WILL WORK WONDERS ON YOUR JEANS?
So, will you be using a regular patch on your denim clothing, or something a bit different? Whichever one you choose, sewing on a patch is definitely a cost-effective and adorable way to change up your wardrobe!
Do you now know how to sew on a patch in a perfect fashion? Let us know about your experience.
DENIM and PATCHES sourced this post originally published on this site


