• Skip to main content
  • Skip to footer

DENIMandPATCHES

we sell DENIM and PATCHES

  • Home
  • About
  • Blog
  • Gallery
  • How To
  • Cart
    • Checkout
    • My account
  • Contact

Blog

Check Our 7 Hassle-Free Tips On How To Shrink Jeans

September 2, 2026 by DENIMandPATCHES

We have all been there; shopping through the mall and scouring all the racks to find the perfect pair of jeans. Sometimes you find the perfect style and fit, but you just need it to be a smidge tighter. Or maybe, you have the perfect pair already but have lost weight so now they just fit a little baggier than they use to. It used to be that getting your pair of jeans to fit you just right was a matter of wishing that they could shrink just a bit. The good news is, that wish is a little more possible than you might think. 

There are things you can do right in your own home to help shrink your jeans so that they can fit just right. That is where we come in. In today’s article, we are going to take a look at some of the best ways to shrink down your jeans right at home.This way, your jeans can fit you in all the right places and offer you absolute comfort. Let’s get started!

How To Shrink Jeans – Need A Hassle-Free Shrinking Solution?

We have all gone through rough patches with our wardrobe items and articles.

I personally remember the angst of not wanting to part with some True Religion jeans that my booty just couldn’t regularly fit into any longer after I lost all the weight I had put on after my freshman year of College.

You see, for me it was the Freshman 50 (instead of 15) during my first year of schooling (and stress-eating). While I was at that heavier weight I had wanted to feel better about myself so I splurged on a nice designer pair of jeans that flattered my new lumps and bumps.

Well, fast forward about a year and a lot of hard work at the gym later and I was back to my healthy normal weight, however my coveted designer jeans gave me a nonexistent saggy looking bottom and chicken legs.

Had I known back then about the tips that I am about to share with you, I would still to this day be rocking those nice looking True Religions. However, silly me (and boy, am I kicking myself now) I just drove them over to Goodwill and parted with them.

*Sigh*, now – a moment of silence for all the lost designer jeans please.

But you ladies and gents don’t have to suffer and make the same irrevocable fashion mistakes that I did. Not to worry, there is still hope for your baggy, overused, and stretched jeans!

There Are Numerous Ways To Shrink Jean​​​​s

Alright, you guys have only an hour to tighten your favorite pair of jeans up before heading out on the town. What are you going to do?!

This is crunch time but there is no time for panicking, because without even realizing it you have everything you need to have a complete jean make-over.

Below are our top 7 tops on how to shrink jeans:

1. COOK THOSE EXTRA INCHES OFF

pan

Okay, no you can’t really cook off inches, but you can definitely cook your jeans to make them up to 5x tighter than they were before. All you’re going to need for this one is a big pot, some water and your loosey-goosey particular pants.

Drop those overused jeans into a boiling pot of water (making sure to fully submerge them) and let those bad boys soak between 20-40 minutes. After the allotted time, get the pants out, wring them out and immediately toss them into the dryer (which must be put on the hottest setting possible).

Disclaimer: If your jeans are not 100% cotton and contain a mix of other materials such as spandex or lycra then I would NOT suggest using this solution as you will likely damage your jeans this way, possibly even making them baggier than they were to begin with. Yikes.

2. TAKE A BATH IN THOSE LOOSE JEANS

jeans

Next time you decide to settle in and draw yourself a relaxing hot bath, make sure to wear your jeans into the water. I know this seems weird, but just hear me out on this one.

If you sit in the tub with your bottom-half completely submerged for half an hour, then get out and wait 10 to let the wet material form to your figure before carefully throwing the garment on the “High” setting in the hot dryer then your jeans will be good as new.

Keep note, this method is especially helpful for those pairs of jeans that are tight in some places and irregularly loose in others. Although you may look silly in the moment, no one will know and no one will care when you strut your stuff in your revamped favorite pair of jeans.

​

3. CRANK THE HEAT UP ON THE DRYER

dryer

We’ve all accidentally ruined a cute new blouse or pair of shorts by throwing them in the dryer without thinking twice and shrinking them to half their original size. However, this time you’re going to do it on purpose!

Throwing jeans on high heat in the dryer will help to tighten up all of the cotton fibers within the pants.

[amazon link=”B003FULBQ4″ title=”4. FABRIC SOFTENER SOLUTION” /]

[amazon box=”B003FULBQ4″]

This solution calls for ¾ water to be mixed with ¼ fabric softener into a spray bottle of your choosing.

Spray and treat areas on your jeans that need the most tightening, and then throw them in the good ol’ dryer on high and watch your life be made easier instantly.

5. IRON THOSE BAGGY BRITCHES

flat iron

Known for being able to apply intense heat in a matter of seconds, irons can greatly help to tighten any pair of jeans before use. Whether it be a singular spot that needs tightened or the entire set, ironing will help to tighten everything up.

Just be careful to always let this article of clothing cool don before putting them on, as they could burn you right after ironing.

6. DON THAT LONG-UNDERWEAR

trousers

Definitely wouldn’t recommend using this tip during the warmer months, as you might quite literally die from heat stroke. However, this solution is great to use during winter as it adds extra layers of warmth for when you are braving the frigid cold outside.

Adding a layer underneath your jeans will help to provide extra snugness to those baggy old jeans and although this isn’t my top recommended solution, it will still do the trick and work for you.

7. START SEWING AWAY

scissors

If worse comes to worse, I would suggest taking those jeans into a seamstress or taking your own nimble hands to it.

If you know how to sew, these jean “remodels” can be completed in almost no time. All you have to do it flip said loose pants inside out, tear out the old inseam and make a new tighter one to ensure a more-snug fit.

If your pants are still too loose after that then you can also sew around a 7-inch piece of elastic into the inside of the waistband, so that the pants can stay snug and fitting all the way up to your waist.

This is my least favorite solution because I hate to mangle the fabric of your jeans like that. If I can help it, I try to avoid sewing and stitching as much as possible.

Please remember to keep in mind that each of the shrinking methods listed above are great ways to enhance the look, fit, comfortability and extend the overall life expectancy on your good ol’ favorite pair of denims.

Each solution offers a solid way to shrink your jeans, it is really just up to your personal preference on which option you would like to go with.

Shrink Those Jeans And Strut Your Stuff

Now that you’ve learned how to shrink jeans – these shrinking options should provide a long-term solution to the problem on hand.

However, just be careful to remember that when attempting to shrink jeans be careful not to set your wet jeans on any light colored carpets or fabrics because bleeding and staining could occur and make sure to be careful when pulling on your newly shrunk jeans belt-loops as you don’t want them to rip out when you start tugging!

Other than that, you should be good to go and set to don these pants and rock those better fitting jeans out and around the town.

We hope these tips have set your mind at ease, as it is easily possible to reuse and recycle your denim for many years to come.

DENIM and PATCHES sourced this post originally published on this site
Filed Under: Blog

The 5 Best Sunscreens to Wear Under Makeup, Tested & Reviewed by Editors

September 2, 2026 by DENIMandPATCHES

Inside: tinted and transparent options for every skin type and tone.

DENIM and PATCHES sourced this post originally published on this site
Filed Under: Blog

Sashiko for Selvedge: A Step-by-Step Beginner’s Guide

September 2, 2026 by DENIMandPATCHES

You Don’t Need a Repair Expert to Extend the Life of Your Well-Worn Selvedge

Well-made selvedge denim has a well-earned reputation for durability. Still, all 100% cotton products have their limits, and even heavy selvedge is no exception.

Usually starting with crotch blowouts or holes in or around the knees, pairs start to go to pieces after a few hundred wears.

When repairs become necessary, you have two options: send your jeans to a professional for invisible mending, or do it yourself with sashiko. The first hides the damage; the second preserves and even showcases the holes and tears.

Strike Golds darned at home (left) vs. Nudies darned by their in-house repair experts

With invisible mending, a backing material is added, and the sewing machine passes back and forth dozens of times, using colour-matched stitches to fill the hole and reinforce the surrounding denim.

Done well, the result of invisible mention is sturdy and inconspicuous. Sashiko is something else entirely.

TL;DR – Sashiko Basics

Sashiko is a Japanese running-stitch technique that both repairs and beautifies well-worn garments. You don’t need any sewing experience. All you need is time, patience, and a few tools: sashiko thread, sashiko needles, a piece of heavy denim for backing, and 3-4 hours (budget more for larger repairs).


Why Denimheads Love Sashiko

With its roots in early-seventeenth-century Japan, sashiko (meaning “little stabs”) was born out of necessity. For rural Japanese fishermen and farmers, fabric was a precious commodity. Repairs extended the life of garments indefinitely (sometimes across generations).

Photo from Selvedge Magazine

It didn’t take long for Japanese ingenuity to turn the necessary repairs into an elegant art form. The simple running stitch (used to affix patches to worn areas) transformed into complex geometric patterns.

Strong, warm, and beautiful beyond measure, sashikoed Japanese workwear became wearable, museum-grade art.

Meiji-period sashiko jacket displayed at the Metropolitan Museum of Art
One of my earliest attempts at sashiko

Key to sashiko’s appeal is its simplicity. You don’t need any machinery or particularly nimble fingers. Even if you’ve never threaded a needle, beautiful sashiko repairs are within reach. Follow the simple steps below, and you’ll be able to start handling your own repairs.

Simple but beautiful repairs by Pey at Sashikodenim

Not only will you be able to mend your jeans in a day or two, you’ll also be able to play a larger part in your pair’s journey. Just as the fades are yours and yours alone, the repairs will be entirely yours as well. Trust us on this. It’s worth the investment of time and effort.


What You’ll Need for Sashiko Denim Repairs

My first few stabs at sashiko were rough but satisfying. I went to my local hobby shop and grabbed some waxed thread, some rough bandana-print material for backing material, and a few needles.

I was happy with the result, but happier with the lesson I took away from the experience: To get the result you want, start with the right tools for the job.

Item #1: Sashiko Thread

Unlike embroidery thread or other sewing threads, sashiko thread is heavy, non-divisible (one solid strand rather than multiple strands twisted together), and usually features a matte finish.

The cost difference is marginal; a single package of sashiko thread (usually 20-40 metres of thread) will last you through multiple repairs.

A white or ecru sashiko thread gives the most traditional look. This is best for repairs on the thighs, knees, and cuffs, where we want the repair to draw attention.

For crotch blow-outs, it’s better to have dark blue or indigo-dyed threads. While there are plenty of folks who use contrasting threads for blowouts in this sensitive area, it’s our advice to keep crotch repairs on the subtler side. 

Buy sashiko thread →
Buy indigo-dyed thread →

Item #2: Sashiko Needles

Like the thread, sashiko needles are purpose-built for sashiko stitching.

They’re longer (important if you’re going to do multiple stitches at a time), the eyes are bigger (to accommodate thicker sashiko thread), and they’re considerably stiffer than other needles (important if you’re repairing heavy denim).

Sashiko needles are available in a few different lengths. There’s no correct length. It’s a matter of preference, so grab a pack that features a range of lengths and try them all out to see what size is perfect for you.

You might also want to grab a pin cushion, especially if you’re prone to misplacing things. Not essential, but certainly a nice thing to have both between and during repair work.

Buy sashiko needles →
Get this pin cushion →

Item #3: Backing Material or Patches

When repairing heavy denim, the best backing material is (you guessed it) heavy selvedge. I use denim samples from SOSO (they send a stack of them with every order, and they’re absolutely perfect for medium-sized repairs).

A few of the denim samples that came with my last SOSO order

If you’re working with lighter weight denim, you should be able to find a robust cotton twill or canvas at your local hobby shop. If you’re mending a large hole, the face of the fabric will be visible, so choose the print wisely. 

Sashiko patches make things as simple as paint by numbers. Just cover the hole with the patch, sew down the edges, and then follow the pattern, which will disappear in the wash. If it’s your first time, start with a simple pattern. 

You can buy these patches here →

Item #4: Pins or Glue

You’ll need something to hold the backing material or patch in place while you’re working on it. A lot of the experts use pins along each side of the patch, but I prefer to use fabric glue, which holds the backing material securely in place.

If you’re using glue, remember that you’ll only want to apply glue to the parts of the patch that will be hidden behind the denim. I use the Sewline Fabric Glue Pen, but there are plenty of others to choose from.

If you’re patching a large hole, trace it out on the backing material and then apply the glue carefully.

Item #5: Thimble or Equivalent

Unless you’ve got incredibly thick skin, you’ll likely want to have something handy that will help you push the needle through multiple layers of thick denim. This is especially important when your repairs cross major seams.

A palm thimble (left) and my DIY solution (right)

A thimble will make the work faster and less painful. I use a small piece of the thick felt that you stick to the bottom of furniture legs to prevent scratches on your wood floors, but I’ve been eyeing a leather thimble like the one below.

You can get this thimble here →

Item #6: Stencils or Fabric Pen

Sashiko repairs can be as rough or refined as you like. You can, for instance, just do running vertical stitches of varying length. There’s a certain charm in rough and naive repairs, but the most striking repairs are precise and geometrical.

You can, with the aid of a grid and water-soluble fabric pen, mark out a pattern to follow with your needle and thread, but for an even simpler solution, you can use these Wash-Away Adhesive Stencils from Clone—an absolute game changer for me.  

Make sashiko repairs easy, buy this stencil →

Step-by-Step Guide to Sashiko Denim Repairs

With the right tools in hand, you’re ready to get started. Work through the steps below in order. Take your time, and don’t be discouraged if the needle feels awkward in your hand at first. You’ll get used to it. 

Step #1: Prepare Your Pair for Repair

When it comes to repairs, the first question is when? For visible repairs, it’s better to push your pair beyond its breaking point—to the point where the jeans need repairs. Purely decorative sashiko is absolutely fine, but sashiko repairs somehow look more natural when they are clearly keeping the pair from disintegrating.

These repairs look incredible in part because the pair clearly NEEDS repairs to be wearable

If it’s been a while since you last washed your pair, you might want to consider washing before you start repair work. This is a must if you’re having anybody else work on your pair. It’s optional if you’re doing it yourself.

Depending on how much you want to showcase the fabric behind the repair, you might want to trim the exposed weft yarns and edges of the hole with scissors. If you’ve been looking for the excuse to get a pair of those nifty Japanese thread trimmers, now’s your chance.

For the cleanest repairs, fold the ragged edge under and then stitch around the edges of the hole. This is an excellent way to show off a great backing material, but you lose some of the charm of rougher repairs with exposed threads.

These clean repairs feature a turned over and stitched down edge around the holes

I usually skip this step, stitching through the ragged edges and exposed weft yarns. I also rarely wash my pairs before repairing them unless the pair need a bath. I like to go as long as possible between washes, so I see the ability to repair without washing as a small luxury. 

Step #2: Back it Up

For this guide, I’m keeping things simple. I’m placing the patch on the inside of the jeans and, using a cross-pattern stencil as a guide, I’ll be stitching through both layers so that, when I wash away the stencil, only the pattern is visible on the face of the denim.

I’m repairing two relatively small holes around a half-inch apart, but both the backing material and the stencil will be around 4 x 4 inches. We want to strengthen not just the affected area but also the surrounding denim, so you’ll want the patch to push out an inch or so in every direction from the hole or rip you’re mending.

Turn the jeans inside out and, with either fabric glue or pins, firmly attach the patch. If you’re using glue, don’t apply glue to the parts of the patch that will show through the repair. Give it a few minutes to dry before turning the pair right side out.

Remember that the glue is not a weight-bearing part of the repair. It’s only there to hold the patch in place while you stitch. As long as the corners are firmly attached, that’s probably enough.

If your hole (like mine) is close to a major seam, cover the major seam with both the backing material and your stencil or pattern. These will be some of the hardest areas to get the needle through, but having the repair extend across this seam is essential if you want a long-lasting repair. 

Step #3: Mark Out or Stick On Your Pattern

If it’s your first time trying sashiko, my recommendation is to start with the classic cross pattern I’ve used here. The crosses don’t have to be precisely the same size, but the spacing is very important if you want the pattern to look right.

These 1/2-inch squares, with crosses in each square and at intersecting points between, is ideal for beginners working with heavy denim

With a fabric pen, you can mark out a grid of half-inch squares. The first vertical row of crosses should each sit in the middle of a square. The second row should cross at the corners of the squares. Each line of the cross should be about a quarter-inch long.

If you’re using an adhesive pattern (recommended), simply stick the pattern to the front side of your jeans, being careful not to allow the adhesive to fold or crease—this will skew the pattern. 

Step #4: Start Your Stitches

Cut a few feet of thread and place two or three knots in one end. Thread the needle with the other end. Pass a considerable amount of thread through the needle (3-4 inches should be enough). It might take a few tries to thread the needle. Be patient.

The knots should be overlapping

Holding the tip of the needle between your thumb and index finger, with your sewing hand on the inside of the jeans, push the tip of the needle through both layers until you’ve found the bottom or top corner of one of the corner crosses. 

It might take a few stabs at it to get it in exactly the right place

Make your way either up or down the line following the short vertical lines in the pattern. Using both hands, guide the point of the needle up at the beginning and down at the end of each short line in the pattern.

If you like, you can stack multiple stitches on one needle, but this simply won’t be possible when you’re working with heavier denim. I’ve found it’s best to just go one stitch at a time. It’s slower but more precise.

After a few stitches, pull the thread through until it’s taught. Lines should be straight but not tight. Work the fabric with your hands to make sure it’s flat and doesn’t pucker around the stitches.

At the end of each line, move diagonally to the first cross in the next line. Leave just a touch of slack in the line each time you do this (not enough to snag when putting the jeans on, but enough to give each line a little breathing room. Finish all of the vertical lines before starting on the horizontal ones.

Step #5: At the End of Your Rope

Continue the pattern until you reach either the end of your thread or the end of the vertical lines. For small repairs, one piece of thread is usually enough for all the vertical lines. For larger ones, you’ll likely want to start a new piece of thread when you’re around the half-way point.

When you’re getting close to the end of the thread or are at the end of the pattern, with the needle on the reverse side, go back to the beginning of the last stitch you made. After passing it through the same hole, bring the needle down again through the middle of the stitch.

Here’s an example using a large stitch showing where your needle should go for your final stitch

Turn the pair inside out to inspect your stitches, looking for long loops of snagged thread. The inside of the repair is not likely to be very aesthetically pleasing. Even expert repairs often look rough on the reverse side. Embrace it.

The reverse side doesn’t have to be pretty to get the job done

Finally, knot the thread two or three times, trying to get the knots quite close to the fabric (leave a bit of room). Then snip the thread close to the knot (not so close that it will come unknotted).

Repeat the same process for the horizontal stitches until the pattern is complete. Then, if you’ve used a wash-off adhesive, give the repaired area a quick dip in the water (no need to fully immerse the pair). It’ll disappear in a few seconds.

Congratulations, you’ve completed your repair. Just let the jeans dry fully before wearing them again.

Step #6: Take Your Time

A medium-sized sashiko repair usually takes me 3-4 hours to complete. I usually just throw on a movie and stitch away with one eye on the TV and the other on my work. My wife is often knitting beside me—the whole scene looks and feels very domestic.

When I’ve tried to speed up the process, I’ve been significantly less satisfied with my work. The best advice I can offer is to take your time and, if you make mistakes, go back and fix them or start again. The slower and more methodical the work, the better the result. 

With each completed repair, your confidence will grow. You might refine a simple style, or you might start to explore more complicated patterns and techniques.

Alternating thread colours turns this relatively simple repair into a stunner

Even the simplest repairs can be eye-catching stunners if infused with personality and a little creativity. Mix up thread colours and look for fabrics that might fill holes or tears both purposefully and artfully.

However you approach the craft, you’ll be playing a hands-on role in your pair’s lifecycle, beautifying and strengthening it with every stitch. You’ll have a deeper relationship with your denim, and, especially if you take your time and do it right, you’ll be intensely proud of both your pair and your repair. 

Pairs Worth Repairing

Time-consuming sashiko repairs only really make sense when the pair is worthy of the extra attention and devotion. If you don’t have a pair like this yet, start the hunt with our Selvedge Masterlist.

DENIM, EXPLAINED

Not Sure Where to Start?

If you’re trying to make sense of raw and selvedge denim, the guides below will help you narrow things down—by brand, weight, and what actually matters when choosing jeans.

  • The Best Raw Denim Brands – A big-picture overview of the most important jeans brands—and how they differ.
  • Lightweight Raw Denim – A curated guide to lighter-weight jeans that are easier to wear day to day.
  • Best Heavyweight Jeans – A guide to heavier denim, what makes it special, and who it’s actually for.

New to Raw Denim?

Get expert insights on raw denim, selvedge, fades, fits, and buying better jeans—delivered to your inbox by me, Thomas, founder of Denimhunters, and author of the guide you’re reading right now.

The post Sashiko for Selvedge: A Step-by-Step Beginner’s Guide appeared first on Denimhunters.

DENIM and PATCHES sourced this post originally published on this site
Filed Under: Blog

7 For All Mankind x Chloë Sevigny Ad Campaign

September 2, 2026 by DENIMandPATCHES

7 For All Mankind introduces Chloë Sevigny as the face of its Fall Winter 2026 campaign, titled “In the City, Off Duty”.

The campaign centers on a relaxed approach to dressing shaped by instinct, movement and the changing pace of a day in New York.

campaign
jeans

{And YES, those are definitely skinny jeans — AND super low rise♨}

Chloë Sevigny is the face of the campaign, photographed by Marili Andre and styled by Haley Wollens. The imagery moves between intimate interiors and New York streets after dark, with blurred city lights and candid, cinematic moments.

skinny jeans
campaign

The campaign is particularly interesting because Sevigny isn’t simply a celebrity fronting a denim brand. She has been appointed a brand ambassador by new creative director Nicola Brognano, marking 7 For All Mankind’s new identity.

The campaign builds around the idea of dressing without strict rules. In the City, Off Duty focuses on moments when plans shift and daytime stretches into evening, placing personal comfort and confidence ahead of dressing for a specific occasion.

leather pants

The Fall/Winter 2026 collection is for women who dress according to their own instincts. Sevigny carries that idea through a series shaped by confidence, personal style and the fluid transition from day into night.

You can shop for 7 For All Mankind’s newest collection on their website.

The post 7 For All Mankind x Chloë Sevigny Ad Campaign first appeared on Denimology.

DENIM and PATCHES sourced this post originally published on this site
Filed Under: Blog

The One Thing Only Super Heavyweight Denim Can Do

September 1, 2026 by DENIMandPATCHES

Affiliate disclaimer: We work with most brands and retailers featured and earn commission on purchases.

Want Dramatic 3D Fades? Your Next Pair of Selvedge Should Be Super Heavyweights 

We’ve long preached the virtues of heavy selvedge denim. Straight out of the box, it looks and feels like nothing else, and the more we wear it, the better it gets.

Many of those who ease a heavy pair through its long break-in period are transformed by the experience. They’re converts for life.

A particularly vivid example of the kind of 3D fades that only heavy selvedge can produce

But what we call heavy selvedge covers a lot of ground. What we’re talking about here is the really heavy stuff. Heavyweight denim starts at 16 oz., but super-heavyweights (20 oz. and heavier) are an entirely different breed. They fight harder and longer, and their break-in period can stretch into months.

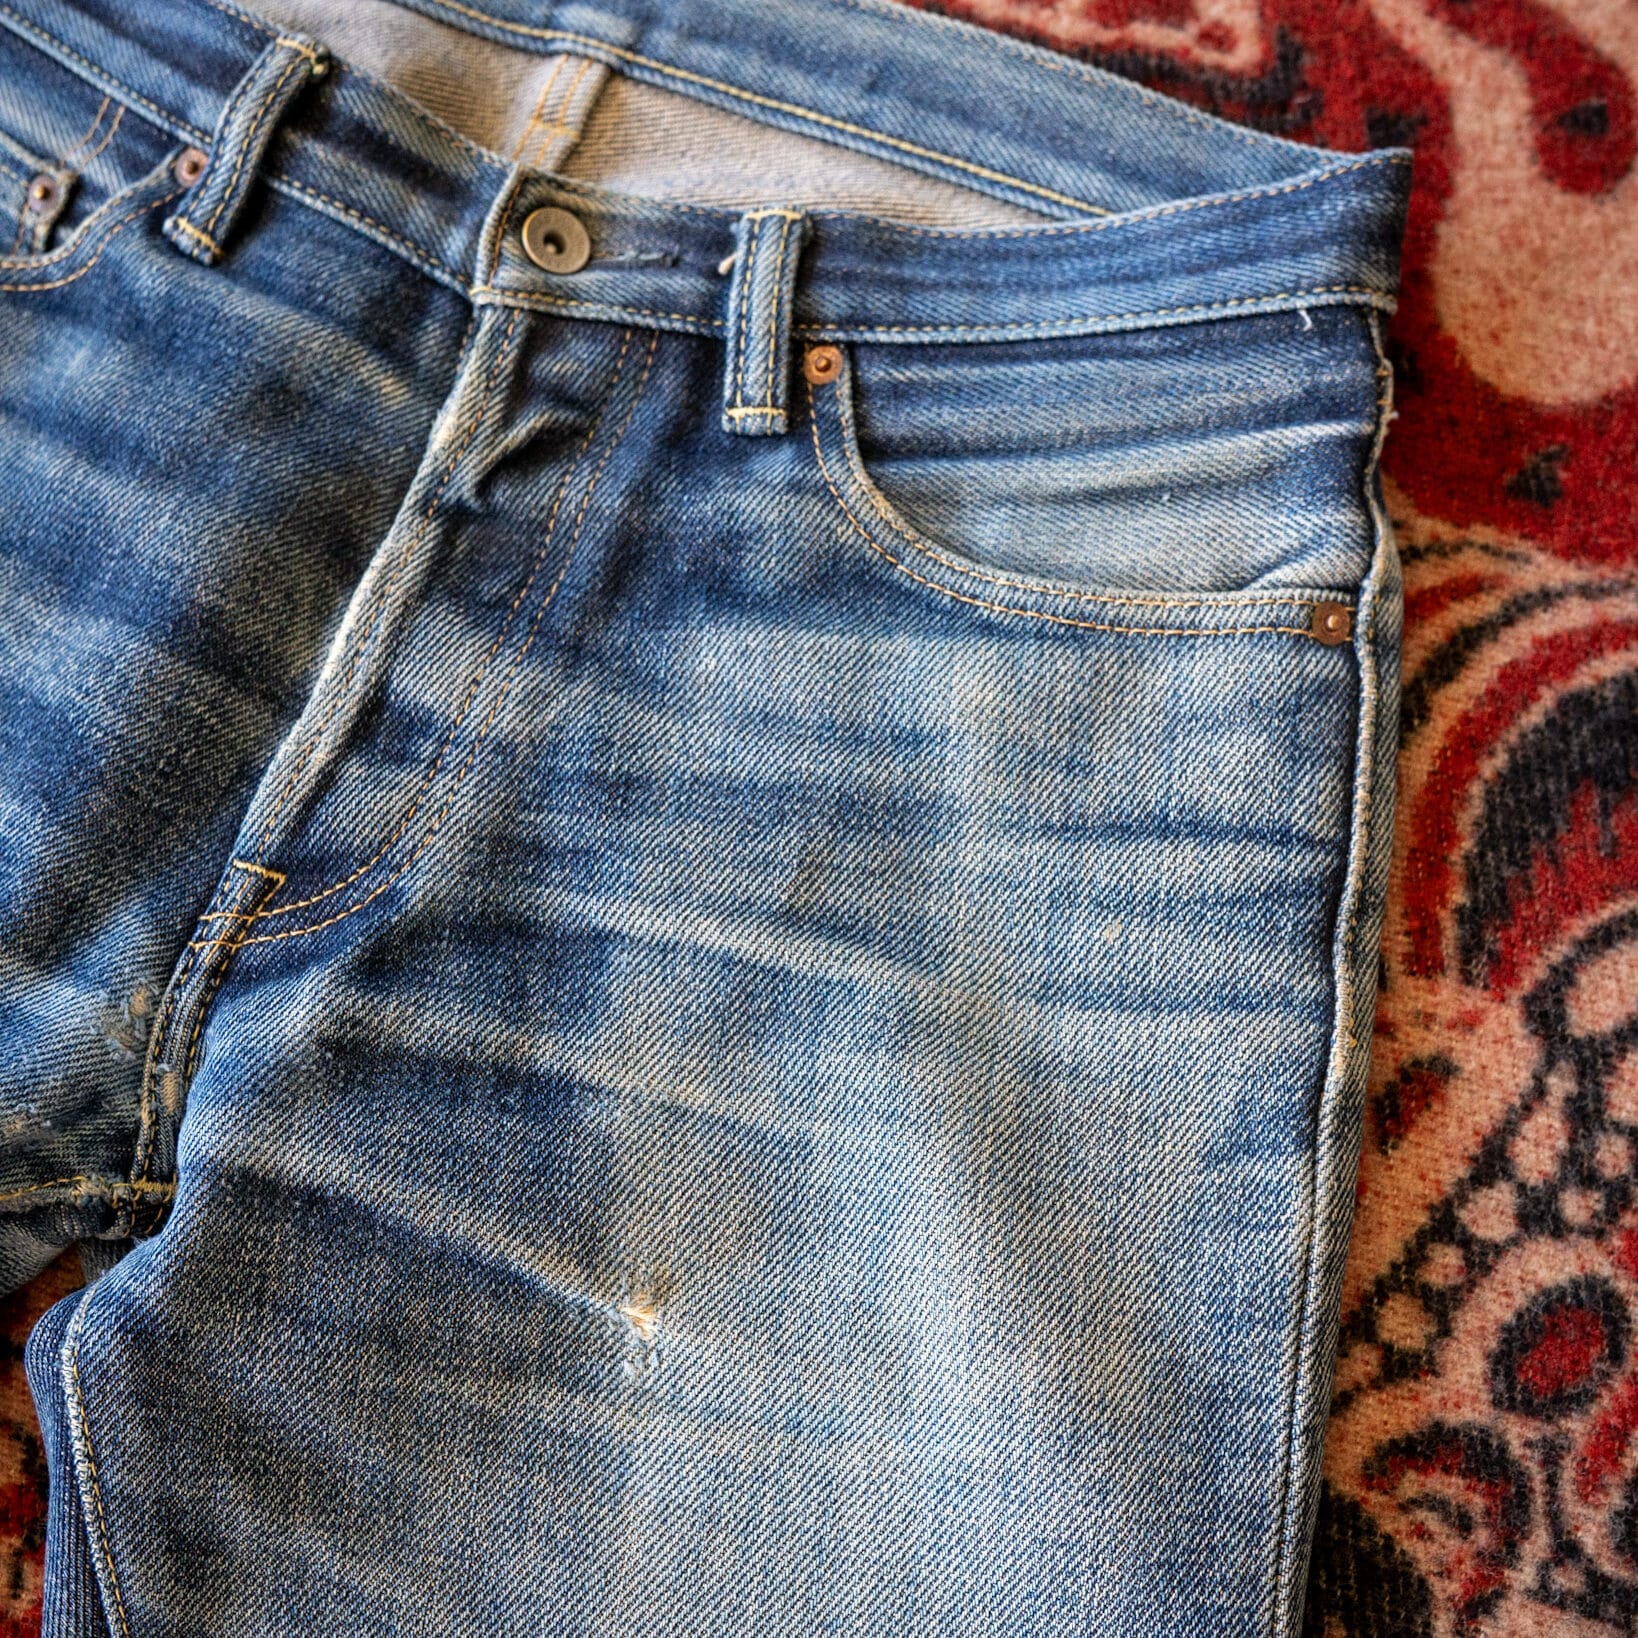
But there’s something waiting for you at the end of this break-in period, and it’s not just the way it looks and feels. Super-heavyweights fade in a very particular way that lighter denim simply can’t imitate: fades are three-dimensional.

TL;DR – Why Super Heavyweight Denim Fades Differently

Super heavyweight denim (20 oz. or heavier) doesn’t crease; it rolls. The result is a striking three-dimensional effect: whiskers, combs, and stacks that reach out and grab your attention. Fades with depth, dimension, and unmatched stopping power.


The Science of 3D Fades (It “Remembers”)

Raw denim’s biggest draw card is its unmatched ability to fade in ways that reflect how it has been worn and made. Every denim fades differently, and every fully faded pair is entirely unique to the wearer.

25 oz. Samurais faded by Jonte Schlenz in the Indigo Invitational

Contrasting fade patterns are the scars left behind from a battle between you and your pair. When you strain and stretch stiff denim, the indigo flakes off the surface, exposing the white core of the yarns. The result is whiskers on the top block, combs behind the knees, and stacks around the ankles.

Combs, whiskers, and stacks on extremely heavy selvedge

These fade patterns emerge wherever the denim creases, bends, and folds. In lighter pairs, the denim creases quite sharply. Whiskers, combs, and stacks look as though they’ve been carved into the surface of the denim with a dull blade.

Both of these 15 oz. middleweights showcase the kinds of fade patterns you find on lighter pairs

Extremely heavy selvedge, though, doesn’t fold or crease. It rolls. Whiskers, combs, and stacks are thicker and more dramatic—like forks of lightning streaking across a dark blue sky.

Thick 3D whiskers on these heavy Strike Golds faded by Syed Bashira

Here’s the important bit: The thick rolls of denim give fades both thrust and depth. The white fade patterns sit on the crest of waves. The jeans aren’t just scarred—they’re a vivid three-dimensional map of your journey and your body’s movement patterns.

A stunning 3D effect on these 27 oz. Adelaides faded by Rudss Jengss

The effect is similar on middleweight pairs, but, with heavy denim, the 3D effect is far more pronounced and dramatic. It’s not just about the sharp contrast of dark and light tones. It’s about how the most dramatically faded parts of the denim thrust themselves forward.

3D combs on a 25 oz. pair of Samurais faded by Mohd Sukry Nordin

To produce this effect, all we need to do is start with a heavy pair and then wear it a lot before washing it for the first time. We need to wait until the fades have well and truly emerged before that first wash. Depending on your lifestyle, six to eight months of daily wear is usually enough. 

After that first wash, something magical happens. The denim “remembers”. Those white fade patterns aren’t just a different colour than the rest of the pair. They’re materially different. They bend more easily, meaning that, when you start wearing it again, the denim rolls in precisely the same way and in the same places

Immediately after washing (left) the combs have been flattened. A few weeks later (right) the 3D effect pushes the combs forward

We don’t need to guide this process in any way. Just sit back and watch as, day after day, the 3D effect slowly re-emerges. Whiskers, combs, and stacks all rise off of the surface, flowing through the same channels they remember.

A pronounced 3D effect from top to bottom of these 24.8 oz. Strike Golds

These 3D fades are the return we get on the deeper investment of both time and money, and they make every dollar and every day we spend in the pair worth it and then some. No wonder so many fade fanatics swear by super heavyweight selvedge.


Heavy Selvedge Built for 3D Fades

For the most dramatic high-contrast fades, start with pairs that are 20 oz. or heavier. The heavier the denim, the thicker the rolls and the more pronounced the 3D effect will be. If you’re looking for the full range of heavyweight options, this guide covers the brands worth knowing.

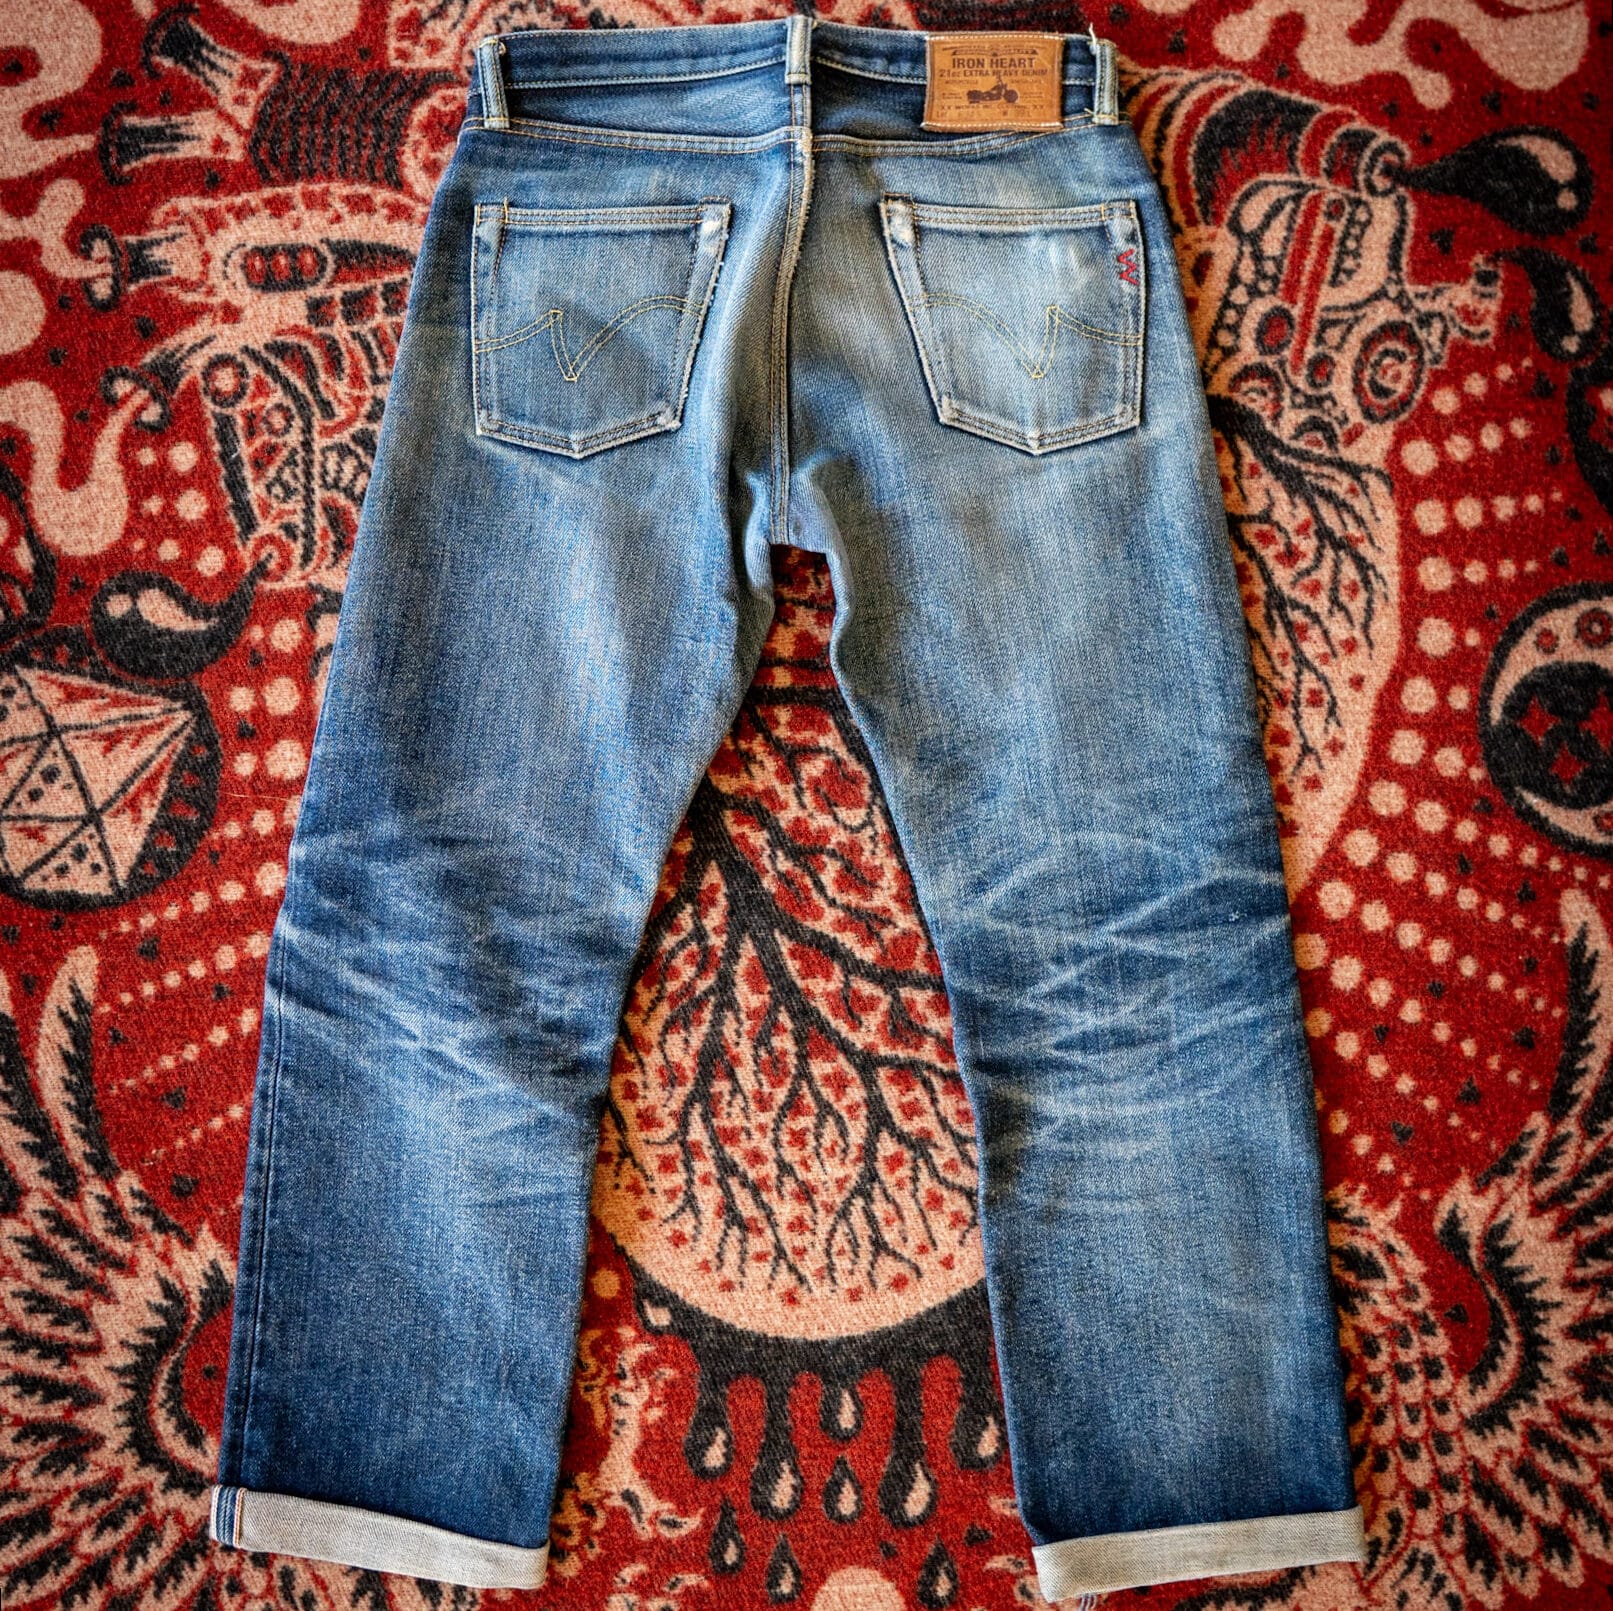
Masterfully faded double-black Iron Heart XHS—expert level fading from Harry Kasim

One thing worth noting: The same effect is possible with black denim, though you’ll need to push significantly harder and longer to get there. For a first attempt, indigo is the better starting point.


Iron Heart XHS

The first name in super heavyweight selvedge, Iron Heart’s XHS selvedge may never have been the world’s heaviest selvedge (their 21 oz. denim briefly held that title), but its reputation for striking contrasts has made it the first choice for those serious about fades.

Fjorde’s beautifully faded 888-XHS from Y4 of the Indigo Invitational

Samurai 25 oz. Selvedge

Each year, Samurai introduces new versions of its super heavyweight selvedge. Primed for serious contrast fades, these stiff denims shed indigo like snakes shed their skin. Sells out quickly, but the world-class fades will be worth waiting for.

Photo by Blue Owl
Faded by Abdul Latif in Y4 of the Indigo Invitational

SOSOBROTHERS Ghost Indigo and Breaker of Legs

Since their foundation, the SOSOBROTHERS have positioned themselves as a go-to brand for those in the search of exceptionally heavy denims. Their 33 oz. Breaker of Legs selvedge was, for a time, the world’s heaviest, and their 25 oz. Ghost Selvedge is an excellent slightly lighter option.

Faded by Daniel Delante in Y4 of the Indigo Invitational

Naked & Famous Elephants

The current title holders for the world’s heaviest selvedge, Naked & Famous shocked the selvedge world with their nearly unwearable 40 oz. selvedge. Their Elephants (with new versions released each year) have legions of fans, and for very good reason.

Photo by Dant
Elephants faded to perfection by Dale Heffernan

Wingman Heavyweights

This Indonesian brand has started making inroads in Europe and North America thanks to their ability to provide unmatched bang for buck for those who want that fade-primed heavy selvedge experience. Extremely popular among fade diehards in Southeast Asia.

Faded by Merdeka Hutapea in Y4 of the Indigo Invitational

Brave Star Heavyweights

The only North American brand to win the Indigo Invitational, Brave Stars are a popular choice for faders looking for tough-as-nails selvedge combined with stylish cuts. Their heaviest pairs sell out quickly but are restocked frequently.

The 25 oz. Brave Stars that won it all in Y3 of the Indigo Invitational

Unbranded 21 oz. Selvedge

One of the most budget-friendly selvedge brands, this Naked & Famous offshoot is one of the easiest paths for hard-to-handle heavyweights. Stripped down to the bare essentials, these pairs offer exceptionally good fade potential for the price.

Faded by Reddit user Silver-Library8372

OldBlue Beasts

In part because this Indonesian brand has only a handful of retailers outside of Southeast Asia, their pairs are a hot commodity in Europe and North America. One of the world’s best heavy fade foundations, this legendary denim is worth waiting for. If it’s in stock, pounce!


Complete the Heavy Kit

Of course, 3D fades like the ones pictured above aren’t limited to jeans. Heavy selvedge denim jackets complete the look, and the fade potential is truly off the charts. Look for some of the heaviest pieces on our guide to selvedge denim jackets here.

Keep Track of What I’m Working On

Hi, I’m Thomas, founder of Denimhunters. If you liked this article, you should check out the DH Weekly. It’s my weekly column and newsletter that I publish every Friday, with new guides, deals, and things worth paying attention to.

The post The One Thing Only Super Heavyweight Denim Can Do appeared first on Denimhunters.

DENIM and PATCHES sourced this post originally published on this site

Filed Under: Blog

Louis Vuitton – Resort 2027 Menswear

September 1, 2026 by DENIMandPATCHES

Louis Vuitton’s Resort 2027 collection, designed by Pharrell Williams, has two interesting denim directions.

1. Indigo denim with a 3-D mud effect
This is probably the most important denim look. The collection features a medium blue denim jacket and matching jeans, finished with a raised 3-D printed “mud” effect around the edges. It’s essentially clean indigo denim transformed through technology and surface treatment.

louis

2. “Leather denim”
Another feature is leather constructed/treated to look like denim, with the wash laser-drawn into comic-like travelogue panels. This pushes denim into the realm of trompe-l’œil and luxury material experimentation rather than traditional jeans.

resort

The fits move between slightly oversized and gently shrunken, rather than overtly baggy or skinny. The denim set is relatively substantial and workwear-inspired.

Worth mentioning is the fact that LV is not relying on distressing or exaggerated rips to make the denim fashion-forward. Instead, the innovation is coming from surface treatment and fabrication.

Below in our gallery, you can see more denim looks from the Resort 2027 menswear collection.

men
jeans
lous
resort

The post Louis Vuitton – Resort 2027 Menswear first appeared on Denimology.

DENIM and PATCHES sourced this post originally published on this site

Filed Under: Blog

MASU – Tokyo Spring 2027 Menswear

August 31, 2026 by DENIMandPATCHES

menswear

MASU is a Tokyo-based contemporary menswear fashion label established in 2017.

The name MASU is derived from the Japanese verb ending in ‘~masu,’ used in polite expressions. In the same way that ‘~masu’ is used in daily life but never loses its value, MASU aims to maintain the same polite attitude over time, just as it is written. 

The brand’s creative director, Shinpei Goto, draws inspiration for his collections from contemporary thoughts, philosophies, historical moments, and exciting ideas in vintage clothing. Goto advocates for ‘making clothes that can be vintage for someone, loved beyond the times.’

spring
menswear

He designs collections with sincere respect for historical clothing styles whose stories and symbols stem from their materials.

MASU Spring 2027 has a meaningful denim story, and it is particularly relevant to the broader Spring 2027 shift toward more expressive, embellished and vintage-influenced denim.

Embellished or bejewelled denim is the big story here. The jeans are not basic blue jeans. MASU applies its recognizable crystal/diamanté treatment, giving denim a highly decorative, almost jewelry-like quality.

denim
jeans

This is an important development from the distressed-denim conversation we’ve been tracking: decoration is replacing destruction as a way of making jeans special.

The fit of the jeans is very personal and vintage inspired. Rather than chasing an extreme runway silhouette, Goto based the jean shape on a pair he personally wears. That gives the jeans a familiar vintage/straight-to-relaxed proportion, while the embellishment makes them contemporary.

embellished
fashion
grey jeans
bejewelled jeans
bootcut jeans

MASU clothing is available to shop for at FARFETCH.

The post MASU – Tokyo Spring 2027 Menswear first appeared on Denimology.

DENIM and PATCHES sourced this post originally published on this site

Filed Under: Blog

RHUDE – Spring 2027 Menswear Lookbook

August 28, 2026 by DENIMandPATCHES

Rhude Spring 2027 is a particularly interesting collection for your menswear denim tracking.

Rhuigi Villaseñor is pushing Rhude further into a post-street wear, luxury-sportswear direction, incorporating football culture, Americana, and more sophisticated tailoring. Fall 2027 is a collection exploring the integration of sports and fashion.

spring

There are several important denim looks in the Spring 2027 collection:

Light blue denim jacket and matching jeans – a perfect denim tuxedo

tuxedo

Light blue denim double breasted blazer worn with matching jeans, particularly significant because it treats denim almost like tailoring/suiting. A very important denim trend for the coming seasons.
It’s a continuation of a broader 2026–27 men’s movement toward tailoring denim. Instead of jeans being exclusively casual streetwear, denim is being cut into blazers, suit-like jackets, and coordinated sets.
jeans

Also noteworthy is the fact that Rhude isn’t returning to skinny denim. The jeans are relaxed and roomy. But what is important is that the styling becomes more elevated. This also fits the broader Spring 2027 menswear shift toward mixing casual denim with tailored and luxury pieces.
Check out more denim looks in our gallery below.

relaxed jeans
grey jeans
washed black
light blue
denim shirts
denim bermudas

You can shop for Rhude items from the current collection at FWRD, Neiman Marcus, and at SSENSE.

The post RHUDE – Spring 2027 Menswear Lookbook first appeared on Denimology.

DENIM and PATCHES sourced this post originally published on this site

Filed Under: Blog

  • Page 1
  • Page 2
  • Page 3
  • Interim pages omitted …
  • Page 21
  • Go to Next Page »

Footer

Search

Tags

12 STEPS AA ALCOHOL apparel BABY BABY JACKET closth clothes comfortable custom custom embroidered CUSTOM EMBROIDERED PATCH DENIM DENIMandPATCHES DENIM JACKET denimjacket JACKET PATCH patches technology your mom

Recent

  • Check Our 7 Hassle-Free Tips On How To Shrink Jeans
  • The 5 Best Sunscreens to Wear Under Makeup, Tested & Reviewed by Editors
  • Sashiko for Selvedge: A Step-by-Step Beginner’s Guide
  • 7 For All Mankind x Chloë Sevigny Ad Campaign
  • The One Thing Only Super Heavyweight Denim Can Do

Shopping

  • Shop DENIMandPATCHES
  • Terms & Conditions
  • Return Policy
  • Your Privacy
  • we sell DENIM and PATCHES
  • Funny
  • Mature
  • Wholesome
  • Cart
  • How To

Copyright © 2026 · DENIMandPATCHES.